Jumat, 31 Oktober 2025

64+ Storage Sheds

Suncast alpine 7.5 ft. x 3.5 ft. resin storage shed www.sears.com

Opening: Building Your Own Backyard Storage Shed Thinking about decluttering your garage or creating some extra space for your lawn equipment? Building your own storage shed can be a fantastic DIY project. This guide will walk you through the process, step-by-step, helping you create a functional and attractive storage solution for your backyard.
Step 1: Planning and Preparation Before you start swinging a hammer, careful planning is crucial.
  • Decide on the Size: Determine the dimensions of your shed based on your storage needs and available space. Consider the height, width, and depth. Think long-term!
  • Check Local Regulations: Research local building codes and permit requirements. You might need a permit for sheds exceeding a certain size or located near property lines.
  • Create a Detailed Plan: Draft a detailed plan, including dimensions, materials list, and construction steps. Online shed plans are readily available and can save you time and effort.
  • Gather Your Tools: Ensure you have all the necessary tools, including a circular saw, drill, level, measuring tape, hammer, safety glasses, work gloves, and a square.
  • Prepare the Site: Clear the area where the shed will be located. Remove any vegetation, rocks, or debris. Level the ground and compact the soil.
  • Step 2: Building the Foundation A solid foundation is the key to a long-lasting shed. There are a few foundation options:
  • Gravel Pad: A simple and cost-effective option, especially for smaller sheds. Spread a layer of gravel several inches thick and compact it.
  • Concrete Slab: Provides a more permanent and stable foundation. Requires more work to pour and cure.
  • Wooden Skid Foundation: Using pressure-treated lumber to build a frame that sits directly on the ground (or a gravel pad) is an easy to implement alternative.
  • For this guide, we'll assume you're building a wooden skid foundation.
  • Cut the Lumber: Cut pressure-treated lumber to the required lengths for the perimeter of your foundation according to your plans.
  • Assemble the Frame: Assemble the frame using screws or nails. Ensure the frame is square by measuring the diagonals – they should be equal.
  • Add Interior Supports: Add additional pressure-treated lumber to provide interior support. Space them evenly and attach them securely to the frame.
  • Level the Foundation: Place the foundation on your prepared site and use shims to level it.
  • Step 3: Framing the Walls Building the wall frames is the next crucial step.
  • Cut the Studs: Cut the wall studs, top plates, and bottom plates according to your plans. Remember to subtract the thickness of the top and bottom plates when calculating the stud length.
  • Assemble the Frames: Assemble each wall frame by attaching the studs between the top and bottom plates. Use screws or nails and ensure the studs are evenly spaced, usually 16 or 24 inches on center.
  • Add Headers: Frame any openings for doors or windows with headers to support the weight above.
  • Sheathe the Walls: Cover the wall frames with plywood or OSB sheathing. Attach the sheathing with nails or screws. This will add strength and stability to the walls.
  • Step 4: Raising the Walls With the wall frames built, it's time to stand them up.
  • Raise the Walls: Carefully lift each wall frame into place, starting with the longest walls. Have a helper or two to assist you.
  • Brace the Walls: Temporarily brace the walls with 2x4s to keep them plumb and prevent them from falling.
  • Secure the Walls: Attach the walls to the foundation using screws or nails. Ensure the walls are square and plumb before permanently securing them.
  • Connect the Walls: Connect the corners of the walls using screws or nails.
  • Step 5: Building the Roof The roof protects your shed from the elements.
  • Build Rafters or Trusses: Depending on the complexity of your roof, you can build rafters or use pre-fabricated trusses. Rafters are individual pieces that form the roof structure. Trusses are pre-built triangular structures.
  • Attach Rafters or Trusses: Attach the rafters or trusses to the top plates of the walls. Ensure they are evenly spaced and securely fastened.
  • Install Sheathing: Cover the rafters or trusses with plywood or OSB sheathing. Attach the sheathing with nails or screws.
  • Apply Roofing Material: Install your chosen roofing material, such as asphalt shingles, metal roofing, or wood shakes. Follow the manufacturer's instructions.
  • Step 6: Installing Doors and Windows Adding doors and windows provides access and natural light.
  • Frame the Openings: Ensure the door and window openings are properly framed and sized.
  • Install the Doors: Install the door and hinges. Ensure the door swings freely and closes properly.
  • Install the Windows: Install the windows according to the manufacturer's instructions.
  • Add Trim: Add trim around the doors and windows to seal the gaps and provide a finished look.
  • Step 7: Finishing Touches The final touches will make your shed functional and visually appealing.
  • Add Siding: Install siding to the exterior walls. Choose a siding material that complements your home's style and provides weather protection (wood siding, vinyl siding, or metal siding).
  • Install Flooring: Add flooring to the shed interior. Options include plywood, OSB, or concrete.
  • Paint or Stain: Paint or stain the shed exterior to protect it from the elements and enhance its appearance.
  • Add Shelving: Install shelving to maximize storage space.
  • Add Ventilation: Install vents to prevent moisture buildup and improve air circulation.
  • Conclusion: Enjoy Your New Storage Shed Congratulations! You've successfully built your own backyard storage shed. With careful planning and execution, you've created a valuable addition to your property that will provide years of reliable storage. Remember to regularly maintain your shed to keep it in good condition.

    Suncast Alpine 7.5 Ft. X 3.5 Ft. Resin Storage Shed

    Suncast alpine 7.5 ft. x 3.5 ft. resin storage shed www.sears.com

    Kepooman Outdoor Storage Shed, Large Tool Sheds, Tool Storage House Shed, 8ft X 4ft Outdoor

    Kepooman outdoor storage shed, large tool sheds, tool storage house shed, 8ft x 4ft outdoor www.walmart.com

    Quality Portable Storage Sheds In Ny

    Quality portable storage sheds in ny fishers-storage-sheds.com
    Read More..

    Kamis, 30 Oktober 2025

    151+ Shed Plan And Material List

    Cedarshed studio 12x6 shed [st126] www.shednation.com

    Introduction: Building Your Own Outdoor Storage Shed Are you tired of clutter taking over your garage, backyard, or home? Building your own storage shed is a fantastic solution to reclaim your space and organize your belongings. This guide provides a comprehensive, step-by-step process to help you construct a sturdy and functional shed. This tutorial will cover a basic gable shed design, suitable for beginners. Let's get started!
    Step 1: Planning and Preparation Before you even think about picking up a hammer, careful planning is essential. This will save you time, money, and potential headaches down the road.
  • Determine Shed Size: Consider your storage needs and available space. Sketch out the dimensions of your desired shed.
  • Check Local Regulations: Research building codes and permit requirements in your area. Compliance is crucial.
  • Create a Detailed Plan: Use online resources, books, or design software to create a detailed shed plan. Include dimensions, materials list, and step-by-step instructions. Several free shed plans are available online, just search for "free shed plan" on a search engine.
  • Gather Materials: Based on your plan, compile a comprehensive materials list. This includes lumber, roofing materials, siding, fasteners, foundation materials, doors, windows (if desired), and any necessary tools.
  • Prepare the Site: Clear the area where you'll be building the shed. Remove grass, rocks, and debris. Level the ground to create a stable foundation.
  • Step 2: Building the Foundation A solid foundation is crucial for the stability and longevity of your shed. There are several foundation options, including concrete slab, gravel pad, or wooden skids. We'll focus on a simple gravel pad foundation.
  • Mark the Outline: Use stakes and string to mark the perimeter of your shed.
  • Excavate: Dig down approximately 6 inches within the marked area.
  • Add Landscape Fabric: Line the excavated area with landscape fabric to prevent weed growth.
  • Fill with Gravel: Add several layers of gravel, compacting each layer thoroughly. Use a tamper or plate compactor for best results. The final gravel layer should be level and provide a stable base.
  • Step 3: Constructing the Floor Frame The floor frame provides the structural support for the shed floor.
  • Cut Lumber: Cut lumber according to the dimensions in your plan for the perimeter frame and interior joists. Pressure-treated lumber is recommended for the floor frame.
  • Assemble the Frame: Assemble the perimeter frame using screws or nails. Ensure the corners are square.
  • Install Joists: Install the interior joists at regular intervals (typically 16 inches on center) between the perimeter frame. Secure them with screws or nails.
  • Attach Plywood Sheathing: Cover the floor frame with plywood sheathing, securing it with screws.
  • Step 4: Framing the Walls The walls provide the shed's vertical support and enclose the space.
  • Cut Wall Studs: Cut wall studs to the desired height, according to your plan.
  • Assemble Wall Frames: Lay out the top and bottom plates for each wall section. Attach the wall studs between the plates at regular intervals (typically 16 inches on center).
  • Create Door and Window Openings: Frame the openings for doors and windows as specified in your plan. Use headers to support the load above the openings.
  • Raise the Walls: Carefully raise each wall frame and position it on the floor frame. Secure the walls to the floor frame using screws or nails.
  • Plumb and Brace Walls: Use a level to ensure the walls are plumb (vertical). Brace the walls temporarily to hold them in place while you secure them to each other.
  • Connect Wall Sections: Connect the wall sections at the corners using screws or nails.
  • Step 5: Building the Roof The roof protects the shed from the elements. We'll construct a simple gable roof.
  • Cut Rafters: Cut rafters according to the dimensions in your plan. The rafter angle will determine the pitch of your roof.
  • Assemble Rafters: Assemble pairs of rafters with a ridge board at the peak.
  • Install Rafters: Position the rafter pairs along the top of the walls, spacing them evenly. Secure them to the walls using screws or nails.
  • Add Sheathing: Cover the rafters with plywood sheathing, securing it with screws.
  • Install Roofing Underlayment: Cover the sheathing with roofing underlayment to protect it from moisture.
  • Install Roofing Material: Install your chosen roofing material (e.g., asphalt shingles, metal roofing) according to the manufacturer's instructions.
  • Step 6: Installing Siding and Trim Siding protects the walls from the elements and enhances the shed's appearance. Trim adds a finishing touch.
  • Install Siding: Attach siding to the walls, overlapping each course as you go. Use screws or nails designed for siding.
  • Install Trim: Install trim around doors, windows, and corners to cover any gaps and create a clean, finished look.
  • Step 7: Installing Doors and Windows Doors provide access to the shed, and windows add natural light.
  • Install Door Frame: Install the door frame in the prepared opening.
  • Hang the Door: Hang the door in the frame, ensuring it swings smoothly.
  • Install Door Hardware: Install door hardware, such as hinges, a handle, and a latch.
  • Install Windows (if desired): Install windows in the prepared openings, following the manufacturer's instructions.
  • Step 8: Finishing Touches These finishing touches will make your shed more functional and aesthetically pleasing.
  • Paint or Stain: Apply paint or stain to the siding and trim to protect the wood and enhance the appearance.
  • Install Shelving: Install shelving to maximize storage space inside the shed.
  • Add Ventilation: Install vents to improve air circulation and prevent moisture buildup.
  • Landscaping: Landscape around the shed to blend it into the surrounding environment.
  • Conclusion: Enjoy Your New Storage Shed! Congratulations! You've successfully built your own outdoor storage shed. With careful planning, dedication, and attention to detail, you can create a valuable addition to your property that will provide years of reliable storage. Enjoy your newly organized space!

    Cedarshed Studio 12x6 Shed [st126]

    Cedarshed studio 12x6 shed [st126] www.shednation.com

    Sheds With Covered Porches — Storage Sheds Mn, Wi

    Sheds with covered porches — storage sheds mn, wi theshedshopusa.com

    Cedar Lap Siding Saltbox Sheds

    Cedar lap siding saltbox sheds www.gazebocreations.com
    Read More..

    Rabu, 29 Oktober 2025

    71+ Storage Shed And Greenhouse Combo

    Self storage units in middleton, wi www.kostorage.com

    Introduction: The Ultimate DIY Storage Shed and Greenhouse Combo Combining a storage shed with a greenhouse is a fantastic way to maximize your space and resources. This project outlines how to build a practical and aesthetically pleasing structure that provides ample storage while nurturing your plants. This build requires intermediate carpentry skills and may take several weekends to complete.
    Materials and Tools Needed Before starting, gather all necessary materials and tools. This will streamline the building process and prevent unnecessary delays.
    • Lumber: Pressure-treated lumber for the foundation and framing, untreated lumber for walls and roofing, cedar or redwood for trim (optional).
    • Greenhouse Glazing: Polycarbonate panels, greenhouse film, or repurposed windows.
    • Fasteners: Screws, nails, bolts, brackets, and appropriate hardware for each material.
    • Concrete Mix: For creating a stable foundation.
    • Gravel: For drainage under the foundation.
    • Roofing Materials: Shingles, metal roofing, or other suitable material.
    • Door and Window: Pre-hung door, greenhouse vents, and storage shed window.
    • Tools: Measuring tape, level, square, circular saw, miter saw, drill, impact driver, hammer, safety glasses, work gloves, post hole digger (if using posts), concrete mixing tools, ladder, staple gun (for greenhouse film).
    Step 1: Planning and Design Begin by creating a detailed plan of your shed and greenhouse combo. Consider the size, layout, and specific requirements of each section. Determine the location of doors, windows, vents, and the type of glazing you want to use. Obtain any necessary building permits. A clear plan saves time and prevents costly mistakes.
  • Foundation: Decide if you want a concrete slab, gravel pad, or post-and-beam foundation.
  • Shed Size: Determine the dimensions of the storage shed portion.
  • Greenhouse Size: Determine the dimensions of the greenhouse portion.
  • Orientation: Consider the sun's path for optimal greenhouse performance.
  • Step 2: Building the Foundation Construct a solid and level foundation. The foundation type depends on your plan and local climate.
  • Concrete Slab: Pour a concrete slab after preparing the ground with gravel for drainage. Ensure the slab is level and allows for proper runoff.
  • Gravel Pad: Create a level gravel bed as a base. This is a less expensive option, suitable for drier climates.
  • Post-and-Beam: Dig post holes, set posts in concrete, and construct a frame on top. Ensure posts are level and properly spaced.
  • Step 3: Framing the Walls Frame the walls of the shed and greenhouse separately. Use pressure-treated lumber for the bottom plate where it contacts the foundation.
  • Wall Assembly: Build the wall frames using studs at 16-inch or 24-inch intervals. Ensure corners are square and securely fastened.
  • Door and Window Framing: Frame openings for the door, window (for the shed), and greenhouse vents.
  • Wall Sheathing: Attach plywood or OSB sheathing to the exterior of the wall frames.
  • Step 4: Raising the Walls and Framing the Roof Carefully raise the framed walls and secure them to the foundation. Then, frame the roof, ensuring a proper slope for water runoff.
  • Wall Attachment: Secure the walls to the foundation using appropriate fasteners. Ensure walls are plumb and braced temporarily.
  • Roof Framing: Construct rafters or trusses, depending on the roof design. Ensure the roof structure is strong enough to support the roofing material and snow load (if applicable).
  • Roof Sheathing: Attach plywood or OSB sheathing to the roof frame.
  • Step 5: Installing Roofing and Siding Install the roofing material to protect the structure from the elements. Then, apply siding to the exterior walls.
  • Roofing Installation: Install roofing felt and then shingles, metal roofing, or other chosen material according to manufacturer's instructions.
  • Siding Installation: Install siding on the exterior walls. Choose a siding material that is durable and weather-resistant. Common options include wood siding, vinyl siding, or metal siding.
  • Step 6: Glazing the Greenhouse Install the chosen glazing material to enclose the greenhouse section.
  • Polycarbonate Panels: Cut and install polycarbonate panels using appropriate fasteners and sealant.
  • Greenhouse Film: Stretch greenhouse film over the frame and secure it with staples or clips.
  • Repurposed Windows: Install repurposed windows into the frame, ensuring a tight seal to prevent drafts.
  • Step 7: Installing Doors, Windows, and Vents Install the pre-hung door for the shed, the window for the shed, and any necessary vents for the greenhouse.
  • Door Installation: Install the pre-hung door according to the manufacturer's instructions.
  • Window Installation: Install the window in the shed section.
  • Vent Installation: Install vents in the greenhouse section to allow for proper ventilation and temperature control.
  • Step 8: Interior Finishing and Customization Finish the interior of the shed and greenhouse to suit your needs.
  • Shed Shelving: Install shelving and storage solutions in the shed.
  • Greenhouse Benches: Build benches or platforms in the greenhouse to hold plants.
  • Electrical and Plumbing (Optional): Install electrical wiring for lighting and heating, and plumbing for watering systems, if desired. (Consult with professionals for these installations).
  • Conclusion: Enjoying Your DIY Storage Shed and Greenhouse Combo Congratulations on building your own storage shed and greenhouse combo! This project provides a practical and versatile space for storage and gardening. Enjoy the benefits of having a dedicated space to store your tools and supplies while also nurturing your plants and extending your growing season. Remember to regularly maintain your structure to ensure its longevity and optimal performance.

    Self Storage Units In Middleton, Wi

    Self storage units in middleton, wi www.kostorage.com

    Storage Units In Dublin

    Storage units in dublin www.storageunitsdublin.com

    How To Buy A Storage Unit

    How to buy a storage unit www.holdstorage.co.uk
    Read More..

    Selasa, 28 Oktober 2025

    82+ Chicken Coop Garden Plans

    Chicken png image pngimg.com

    Introduction: Combining Chickens and Gardening A Symbiotic Relationship Integrating a chicken coop with a garden offers a multitude of benefits. Chickens naturally control pests, fertilize the soil, and reduce weeds. The garden, in turn, can provide supplementary food for the chickens. This guide provides step-by-step instructions for building a DIY chicken coop garden.
    Step 1: Planning and Design Before you begin, careful planning is essential. Consider the size of your flock, the space available, and local regulations. Sketch out your design, including the coop dimensions, garden beds, and fencing. Determine the orientation to maximize sunlight exposure for both the chickens and the plants.
  • Coop Size: Allow at least 4 square feet of coop space per chicken.
  • Run Size: Provide at least 8 square feet of run space per chicken.
  • Garden Bed Dimensions: Customize the size and number of beds based on your gardening needs.
  • Drainage: Ensure proper drainage to prevent waterlogging in both the coop and garden.
  • Step 2: Gathering Materials Create a comprehensive list of materials needed for both the coop and the garden. This may include:
  • Lumber: Pressure-treated lumber for framing and untreated lumber for interior components.
  • Hardware Cloth: For creating a secure and predator-proof run.
  • Roofing Material: Shingles, metal roofing, or corrugated plastic.
  • Chicken Wire: Optional, for reinforcing the run or creating internal dividers.
  • Soil: Topsoil, compost, and other soil amendments.
  • Fencing: For protecting the garden from the chickens when needed.
  • Tools: Saw, drill, hammer, measuring tape, level, and other essential tools.
  • Step 3: Building the Coop Frame Construct the base frame of the coop using pressure-treated lumber. Ensure the frame is level and square. Attach upright supports to the base frame to form the walls. Add a top frame for the roof support.
  • Base Frame: Use 4x4 lumber for a sturdy foundation.
  • Wall Framing: Use 2x4 lumber for the wall studs.
  • Roof Framing: Design a sloped roof for proper water runoff.
  • Step 4: Enclosing the Coop Cover the walls and roof with plywood or other suitable materials. Cut openings for the door and windows. Install hardware cloth on any openings to prevent predators from entering.
  • Wall Sheathing: Use exterior-grade plywood for durability.
  • Roof Sheathing: Ensure a tight seal to prevent leaks.
  • Door and Window Installation: Use hinges and latches for secure closure.
  • Step 5: Constructing the Run Build a secure run adjacent to the coop. Use hardware cloth to enclose the run, burying it several inches into the ground to prevent digging predators. Consider adding a roof to the run to provide shade and protection from the elements.
  • Run Frame: Use lumber similar to the coop frame.
  • Hardware Cloth Attachment: Securely attach the hardware cloth to the frame with staples or screws.
  • Burying the Hardware Cloth: Dig a trench around the perimeter of the run and bury the hardware cloth at least 12 inches deep.
  • Step 6: Building the Garden Beds Construct raised garden beds around the perimeter of the run or within a designated area. Use lumber or other suitable materials to create the bed frames. Fill the beds with a mixture of topsoil, compost, and other soil amendments.
  • Bed Frame Construction: Use rot-resistant lumber for longevity.
  • Soil Preparation: Ensure well-draining and nutrient-rich soil.
  • Bed Layout: Plan the layout of the beds to optimize sunlight exposure and accessibility.
  • Step 7: Integrating the Coop and Garden Connect the coop and run to the garden. This could involve creating a pathway for the chickens to access the garden or simply placing the garden beds adjacent to the run. Install fencing or other barriers to protect the plants from the chickens when necessary.
  • Chicken Access: Provide a controlled pathway for chickens to access the garden.
  • Plant Protection: Use fencing, netting, or row covers to protect vulnerable plants.
  • Compost Management: Utilize chicken manure as a valuable compost ingredient.
  • Step 8: Finishing Touches Add any final details to the coop and garden. This may include:
  • Roosts: Install roosting bars inside the coop.
  • Nesting Boxes: Provide nesting boxes for egg-laying.
  • Watering System: Install a watering system for the chickens.
  • Plant Selection: Choose plants that are beneficial to both the chickens and the garden.
  • Landscaping: Add aesthetic touches to enhance the overall appearance.
  • Conclusion: Enjoying the Benefits of a Chicken Coop Garden By following these steps, you can successfully build a DIY chicken coop garden that provides a sustainable and productive environment for both your chickens and your plants. Remember to monitor the interaction between the chickens and the garden to ensure the health and well-being of both. Enjoy the fresh eggs and bountiful harvests!

    Chicken Png Image Transparent Hq Png Download

    Chicken png image transparent hq png download freepngimg.com

    Fried Chicken Free Stock Photo

    Fried chicken free stock photo publicdomainpictures.net

    Chicken Png Image

    Chicken png image pngimg.com
    Read More..

    Senin, 27 Oktober 2025

    59+ Chicken Chop Berasal Dari Mana

    Grilled chicken leg quarters thecookful.com

    Introduction: Building Your Own DIY Birdhouse Attracting birds to your yard is a rewarding experience. Providing them with a safe and comfortable nesting place is a great way to do this. This guide provides step-by-step instructions on how to build a simple birdhouse using readily available materials. Not only is this a fun and engaging project, but it's also a wonderful way to contribute to local wildlife conservation. This project is suitable for beginners and can be easily customized to suit your preferences and available materials.
    Materials and Tools Needed: Before you begin, gather the following:
  • Wood: Untreated wood is best for birds. Pine, cedar, or redwood are good choices. A single board (approximately 1" x 6" x 6') should be sufficient.
  • Saw: A hand saw or power saw will work.
  • Drill: With various drill bits.
  • Screws or Nails: Galvanized or exterior-grade screws/nails are recommended.
  • Measuring Tape or Ruler: For accurate cuts.
  • Pencil: For marking wood.
  • Sandpaper: To smooth rough edges.
  • Safety Glasses: For eye protection.
  • Optional: Exterior paint or stain (bird-safe, non-toxic) for decoration.
  • Step 1: Cutting the Wood Following these dimensions (adjust as needed based on the bird species you want to attract), cut the wood pieces:
  • Front: 6" wide x 8" high
  • Back: 6" wide x 10" high
  • Sides (2 pieces): 6" wide x 7" high (with a slight angle cut on the top edge of each side, sloping downwards from back to front)
  • Bottom: 4" wide x 6" long
  • Roof (2 pieces): 4" wide x 7" long
  • Carefully measure and cut each piece ensuring accuracy for a proper fit. Use safety glasses when sawing.
    Step 2: Assembling the Box Start by attaching the sides to the bottom piece. Align the side pieces with the edges of the bottom, ensuring they are flush. Secure with screws or nails. Next, attach the front piece to the assembled sides and bottom. Then, attach the back piece. The back piece should extend slightly above the sides, creating a slight overhang. This overhang will help protect the entrance from rain.
    Step 3: Creating the Entrance Hole The size of the entrance hole depends on the bird species you want to attract. For example:
  • Wrens: 1 1/8" diameter
  • Chickadees: 1 1/4" diameter
  • Bluebirds: 1 1/2" diameter
  • Use a drill with the appropriate sized drill bit to create the entrance hole in the center of the front piece, about 2 inches below the top.
    Step 4: Attaching the Roof Attach the roof pieces to the top of the birdhouse, overlapping them slightly at the peak to create a waterproof seal. Secure with screws or nails. Ensure the roof overhangs the front and sides to provide further protection from the elements.
    Step 5: Sanding and Finishing Sand all rough edges and surfaces to prevent injury to the birds. If you choose to paint or stain the birdhouse, use only bird-safe, non-toxic paints or stains and apply them to the exterior only. Allow the paint or stain to dry completely before placing the birdhouse in your yard. Avoid painting the interior of the birdhouse.
    Step 6: Mounting the Birdhouse Consider the preferred habitat of the bird species you're targeting. Mount the birdhouse on a pole, tree, or building using appropriate hardware. Ensure the birdhouse is securely attached and faces away from prevailing winds. Avoid placing the birdhouse in direct sunlight.
    Conclusion: Enjoy Your New Birdhouse! Congratulations! You've successfully built your own DIY birdhouse. Now, find the perfect spot to place it and wait for your feathered friends to move in. Remember to clean the birdhouse annually after the nesting season has ended to remove old nests and debris. Enjoy watching the birds and contributing to their well-being.

    Easy Chicken Recipes In Under 30 Minutes

    Easy chicken recipes in under 30 minutes www.licious.in

    Grilled Chicken Leg Quarters

    Grilled chicken leg quarters thecookful.com

    Fried Chicken

    Fried chicken animalia-life.club
    Read More..

    Minggu, 26 Oktober 2025

    56+ Shed With Wood Paneling

    Cedar lap siding deluxe estate sheds www.gazebocreations.com

    ```html
    Introduction: Building Your Own 56+ Shed with Wood Paneling A 56+ shed provides ample storage space and can be customized to fit your needs. Adding wood paneling gives it a polished and aesthetically pleasing look. This guide provides a step-by-step approach to building your own shed with wood paneling. Note that local building codes may apply, so ensure you obtain necessary permits before starting construction. Safety is paramount. Always wear appropriate safety gear such as gloves, eye protection, and a dust mask when cutting wood or handling power tools.
    Step 1: Planning and Design Planning is critical for a successful shed build. Consider these aspects:
  • Size and Location: Determine the dimensions of your shed (e.g., 8'x7', 10'x6', or larger). Choose a level location with good drainage, keeping setbacks from property lines in mind.
  • Foundation: Decide on the foundation type: concrete slab, gravel pad, or pre-cast concrete blocks. A solid foundation prevents settling and moisture issues.
  • Framing: Plan the framing layout. A common approach is using 2x4 lumber for the walls and roof framing, spaced 16" or 24" on center.
  • Wood Paneling: Select your desired wood paneling (e.g., plywood, shiplap, or tongue-and-groove). Choose a thickness appropriate for exterior use and resistance to weather. Consider pre-primed or pre-stained options for easier finishing. Calculate the quantity of paneling needed based on your wall dimensions.
  • Doors and Windows: Plan the size and placement of doors and windows. You can buy pre-hung doors and windows for easier installation, or build your own.
  • Roofing: Choose roofing materials (e.g., asphalt shingles, metal roofing, or wood shingles). Calculate the necessary amount of roofing material based on the roof's square footage.
  • Drawings and Materials List: Create detailed drawings with all dimensions. Develop a complete materials list, including lumber, fasteners (nails, screws), roofing, windows, doors, paneling, and any other necessary supplies.
  • Step 2: Foundation Preparation The foundation is the base of your shed, and a properly prepared foundation will ensure the shed's longevity and stability.
  • Gravel Pad: For a gravel pad, excavate the area to a depth of approximately 6-8 inches. Lay down landscape fabric to prevent weed growth. Fill the excavated area with compacted gravel. Use a plate compactor to ensure a solid and level surface.
  • Concrete Slab: For a concrete slab, construct a wooden form. Lay down a layer of compacted gravel and reinforcement mesh (rebar or wire mesh). Pour concrete into the form, level it, and allow it to cure completely.
  • Concrete Blocks: Position pre-cast concrete blocks on compacted soil, ensuring they are level.
  • Step 3: Framing the Floor The floor frame provides the base for the shed walls.
  • Cut Lumber: Cut lumber according to your floor plan dimensions.
  • Assemble the Frame: Assemble the frame using nails or screws. Ensure corners are square.
  • Install Joists: Install floor joists within the frame, typically spaced 16" or 24" on center.
  • Attach Sheathing: Attach plywood or OSB sheathing to the floor frame using nails or screws.
  • Step 4: Framing the Walls Wall framing provides the structural support for the shed.
  • Cut Lumber: Cut lumber for wall studs, top plates, and bottom plates according to your plan.
  • Assemble Wall Frames: Assemble each wall frame separately on the floor. Include openings for doors and windows.
  • Raise and Secure Walls: Raise each wall frame and secure it to the floor frame. Use temporary braces to keep the walls plumb and level.
  • Connect Walls: Connect the walls together at the corners using nails or screws.
  • Install Headers: Install headers above door and window openings for structural support.
  • Step 5: Framing the Roof The roof framing provides the structure for the roof covering.
  • Cut Rafters: Cut rafters according to your desired roof pitch and dimensions. A common roof pitch is 4/12 or 6/12.
  • Assemble Rafters: Assemble rafters and a ridge board.
  • Install Rafters: Install the rafters, ensuring they are securely attached to the top plates of the walls.
  • Attach Roof Sheathing: Attach plywood or OSB sheathing to the rafters to create a solid roof surface.
  • Step 6: Installing Wood Paneling Wood paneling adds the finished look to your shed.
  • Prepare Paneling: Cut the wood paneling to the appropriate sizes for each wall section. Ensure a clean, straight cut. Apply a coat of primer or stain to the paneling before installation if desired.
  • Attach Paneling: Attach the wood paneling to the wall studs using nails or screws. Ensure the paneling is aligned properly and securely fastened. Use a level to ensure vertical alignment.
  • Seal Seams: Caulk or seal the seams between panels to prevent water penetration, especially if using shiplap or tongue-and-groove.
  • Trim and Finishing: Install trim around doors, windows, and corners for a finished look. Consider adding decorative elements or additional coats of stain or paint.
  • Step 7: Installing Doors and Windows Doors and windows provide access and light.
  • Install Door Frame: If using a pre-hung door, install the door frame according to the manufacturer's instructions.
  • Install Door: Install the door into the frame, ensuring it swings freely and closes securely.
  • Install Window Frame: Install the window frame according to the manufacturer's instructions.
  • Install Window: Install the window into the frame, ensuring it is properly sealed.
  • Caulk Around Frames: Caulk around the door and window frames to prevent drafts and water leaks.
  • Step 8: Roofing The roof provides protection from the elements.
  • Install Underlayment: Install roofing underlayment (felt paper or synthetic underlayment) over the roof sheathing to provide a waterproof barrier.
  • Install Roofing Material: Install your chosen roofing material according to the manufacturer's instructions. Overlap the shingles or metal panels properly to prevent leaks.
  • Install Flashing: Install flashing around the chimney (if applicable), vents, and roof edges to prevent water penetration.
  • Step 9: Finishing Touches Finishing touches enhance the appearance and functionality of your shed.
  • Paint or Stain: Apply paint or stain to the exterior of the shed to protect the wood and enhance its appearance.
  • Interior Finishing: Consider adding interior finishing such as shelving, workbenches, or insulation.
  • Landscaping: Landscape around the shed to improve its appearance and integrate it into your property.
  • Gutters and Downspouts: Install gutters and downspouts to direct rainwater away from the foundation.
  • Conclusion: Enjoy Your New Shed Building a 56+ shed with wood paneling is a rewarding project that provides valuable storage space and enhances your property's value. By following these steps carefully and taking your time, you can create a durable, attractive, and functional shed that meets your specific needs. Remember to adhere to local building codes and prioritize safety throughout the construction process.
    ```

    Cedarshed Studio 12x6 Shed [st126]

    Cedarshed studio 12x6 shed [st126] www.shednation.com

    Cedar Lap Siding Deluxe Estate Sheds

    Cedar lap siding deluxe estate sheds www.gazebocreations.com

    Cedar Lap Siding Saltbox Sheds

    Cedar lap siding saltbox sheds www.gazebocreations.com
    Read More..

    Sabtu, 25 Oktober 2025

    73+ Flat Roof Design Plans

    House porch design, house with porch, shop house plans, cottage house plans, flat roof design www.pinterest.fr

    Opening: Preparing for Your DIY Flat Roof Design Plan Before diving into the exciting world of DIY flat roof design, it's essential to understand that these plans require a commitment to safety, precise measurements, and adherence to local building codes. This guide offers a general overview, but consulting with a qualified professional is always recommended, especially for larger or complex projects. We'll walk through the essential steps to help you create a basic design for a shed or small outbuilding. This is not a substitute for professional engineering or architectural advice.
    Step 1: Assessing Your Needs and Local Codes Start by clearly defining the purpose of your flat roof. Will it be for a shed, a patio cover, or something else? Consider the climate you live in. Snow load, rainfall, and wind exposure all play significant roles in determining the structural requirements of your roof.
  • Research local building codes and permit requirements. Ignoring these can lead to fines or forced removal of your structure.
  • Determine the size and dimensions of your desired roof. Accurate measurements are crucial for material calculations.
  • Step 2: Choosing Your Materials Selecting the right materials is critical for the longevity and performance of your flat roof. Common options include:
  • Wood Framing: Typically, pressure-treated lumber is used for the structural frame. Consider using engineered lumber for longer spans.
  • Roof Decking: Plywood or OSB (Oriented Strand Board) provides the solid surface for the roofing membrane. Ensure it's rated for exterior use.
  • Roofing Membrane: Options include modified bitumen, EPDM rubber, TPO, and PVC. Each has its pros and cons regarding cost, durability, and installation difficulty. Modified bitumen is generally more DIY friendly, but EPDM is often chosen for its seamless application.
  • Insulation: Rigid foam insulation helps regulate temperature and prevent condensation.
  • Fasteners: Use appropriate screws and nails for the materials you're working with.
  • Flashing: Metal flashing is essential around edges, penetrations (like vents), and any other vulnerable areas to prevent water intrusion.
  • Step 3: Developing Your Framing Plan The framing plan is the skeleton of your flat roof. It dictates the size and spacing of the joists and rafters.
  • Calculate the required joist size and spacing based on the span and expected load. Online span calculators can be helpful. A slight slope (1/4 inch per foot) is generally recommended for drainage. This can be achieved by varying joist heights or using tapered insulation.
  • Determine the layout of the rafters and how they will connect to the supporting walls or beams.
  • Create a detailed drawing of your framing plan, including all dimensions and material specifications. This drawing will be your roadmap during construction. Consider using CAD software or even graph paper for accurate representations.
  • Step 4: Planning for Drainage Proper drainage is paramount for a flat roof. Standing water can lead to leaks and structural damage.
  • Incorporate a slight slope (minimum 1/4 inch per foot) to direct water towards the drains.
  • Install scuppers or internal drains to allow water to exit the roof. Internal drains require careful detailing to prevent leaks.
  • Ensure the drainage system is sized appropriately for your local rainfall patterns.
  • Step 5: Insulation and Membrane Application Planning This step details how you will insulate and waterproof your flat roof.
  • Choose rigid foam insulation with the appropriate R-value for your climate. Consider layering insulation for better performance.
  • Plan the application of the roofing membrane according to the manufacturer's instructions. Overlap seams adequately and seal them properly.
  • Determine the flashing details for all edges and penetrations. Properly installed flashing is crucial for preventing leaks.
  • Conclusion: Review, Revise, and Build Smart Creating a DIY flat roof design plan requires meticulous planning and a thorough understanding of construction principles. Always double-check your measurements, consult with professionals when needed, and prioritize safety. This guide provides a basic framework, but remember that every project is unique. Before you begin construction, review your plan carefully and make any necessary revisions. Building a flat roof is a rewarding project, but it's essential to approach it with knowledge, caution, and a commitment to quality workmanship.

    Flat Roof Framing Plan

    Flat roof framing plan infoupdate.org

    House Porch Design, House With Porch, Shop House Plans, Cottage House Plans, Flat Roof Design

    House porch design, house with porch, shop house plans, cottage house plans, flat roof design www.pinterest.fr

    Harmonious Flat Roof Houses Design Home Plans Blueprints

    Harmonious flat roof houses design home plans blueprints www.hotzxgirl.com
    Read More..

    Jumat, 24 Oktober 2025

    Using do and does, definition and example sentences englishgrammarhere.com

    ```html
    Introduction: DIY Birdhouse Project Are you looking for a fun and rewarding DIY project? Building a birdhouse is a great way to attract feathered friends to your backyard and add a touch of charm to your outdoor space. This step-by-step guide will walk you through the process of constructing a simple yet functional birdhouse.
    Materials Needed: Before you begin, gather the necessary materials. Here's a list of what you'll need:
  • Untreated wood (pine, cedar, or redwood are good choices)
  • Saw (hand saw or power saw)
  • Drill with various sized drill bits
  • Screws or nails
  • Wood glue
  • Measuring tape or ruler
  • Pencil
  • Sandpaper
  • Optional: Paint or wood stain (ensure it's bird-safe!)
  • Step 1: Cutting the Wood Using your measuring tape and pencil, measure and mark the wood pieces according to the following dimensions. These dimensions are for a basic birdhouse, but feel free to adjust them to your desired size:
  • Front: 6" wide x 8" tall
  • Back: 6" wide x 10" tall
  • Sides (2): 6" wide x 7" tall
  • Bottom: 6" wide x 6" deep
  • Roof (2): 6" wide x 8" deep
  • Carefully cut each piece using your saw. Make sure the cuts are straight and clean for a snug fit.
    Step 2: Assembling the Birdhouse Walls Apply wood glue to the edges of the bottom piece. Attach the front, back, and side pieces to the bottom, ensuring they are square and flush. Secure the pieces with screws or nails. Use a clamp if available to hold the pieces together while the glue dries.
    Step 3: Adding the Roof Apply wood glue to the top edges of the front, back, and side pieces. Attach the roof pieces, ensuring they overhang evenly on all sides. Secure the roof with screws or nails.
    Step 4: Drilling the Entrance Hole Use your drill to create an entrance hole in the front of the birdhouse. The size of the hole will determine the types of birds that can nest in your birdhouse. A 1 1/2" diameter hole is suitable for wrens, chickadees, and nuthatches. Drill the hole about 2 inches from the top of the front piece.
    Step 5: Adding Drainage and Ventilation Drill a few small drainage holes (about 1/4" diameter) in the bottom of the birdhouse to prevent water from accumulating. Also, drill small ventilation holes (about 1/4" diameter) near the top of the side pieces to provide airflow.
    Step 6: Sanding and Finishing (Optional) Use sandpaper to smooth any rough edges or splinters on the birdhouse. If desired, you can paint or stain the birdhouse with bird-safe, non-toxic paint or stain. Avoid painting the inside of the birdhouse.
    Step 7: Mounting the Birdhouse Choose a suitable location to mount your birdhouse. Consider factors such as protection from predators, sunlight exposure, and accessibility for cleaning. Mount the birdhouse on a pole, tree, or building using appropriate hardware.
    Conclusion: Enjoy Your New Birdhouse! Congratulations! You've successfully built your own birdhouse. Now sit back and enjoy watching the birds that come to call it home. Remember to clean the birdhouse out annually after nesting season to keep it a safe and healthy environment for your feathered friends.
    ```

    Using Do And Does, Definition And Example Sentences

    Using do and does, definition and example sentences englishgrammarhere.com

    Do Vs Does Questions In The Present Simple Tense

    Do vs does questions in the present simple tense www.grammar.cl

    Do Vs. Does

    Do vs. does www.youtube.com
    Read More..

    Kamis, 23 Oktober 2025

    121+ Flat Roof Design Plans Pdf

    Best 20+ flat pictures & images unsplash.com

    ```html
    Welcome to our step-by-step guide on how to build your own flat roof design plans PDF! This guide will walk you through the necessary steps to create professional-looking plans for your flat roof project. Whether you're a seasoned contractor or a DIY enthusiast, this tutorial will help you get started.
    Materials and Software Needed:
    • Computer with internet access
    • CAD software (e.g., AutoCAD, DraftSight Free option, or SketchUp)
    • PDF creation software (most CAD software includes this, or use a free PDF printer)
    • Accurate measurements of your roof area
    • Pencil and paper for initial sketches
    Step 1: Measuring and Sketching Your Roof
    • Carefully measure the length and width of your existing roof. Take multiple measurements to ensure accuracy.
    • Sketch a rough outline of your roof on paper. Include any existing structures like vents, skylights, or chimneys.
    • Note the direction of any slope (even slight) for drainage.
    • Record all measurements and notes on your sketch.
    Step 2: Choosing Your CAD Software
    • Select a CAD (Computer-Aided Design) software that suits your skill level and budget.
    • Free options like DraftSight are suitable for basic flat roof designs.
    • Paid options like AutoCAD offer more advanced features but require a subscription.
    • Ensure the software can export your design to PDF format.
    Step 3: Creating the Base Plan in CAD
    • Open your chosen CAD software and start a new drawing.
    • Use the line or rectangle tools to draw the outline of your roof based on your measurements from Step 1.
    • Scale the drawing to ensure accurate dimensions.
    Step 4: Adding Details and Annotations
    • Add details to your drawing such as:
      • Location of drains
      • Type and direction of insulation
      • Membrane type
      • Parapet wall heights (if applicable)
      • Location of any roof penetrations (vents, skylights, etc.)
    • Use text tools to annotate your drawing, labeling each component clearly.
    • Include details about the roof slope (if any) and the intended drainage path.
    Step 5: Incorporating Structural Details (Optional)
    • If you need to show structural details, add information about the roof joists, rafters, and supporting walls.
    • Consult structural engineering resources or a professional engineer for accurate structural information.
    • Include details about the roof decking material and thickness.
    Step 6: Adding Dimensions and Notes
    • Use the dimensioning tools in your CAD software to add precise dimensions to your plan.
    • Include overall dimensions as well as dimensions for specific features.
    • Add notes to explain any specific construction details or materials.
    Step 7: Review and Refine
    • Carefully review your design for any errors or omissions.
    • Double-check all dimensions and annotations.
    • Make any necessary revisions to ensure accuracy and clarity.
    Step 8: Exporting to PDF
    • Once you are satisfied with your design, export it to PDF format.
    • Most CAD software has a built-in PDF export function.
    • If not, you can use a free PDF printer driver.
    • Choose a suitable page size and orientation for your PDF.
    Step 9: Final Review and Distribution
    • Open the generated PDF and review it one last time.
    • Ensure all information is clear and accurate.
    • Distribute the PDF electronically or print it out for your project.
    Congratulations! You have successfully created your own flat roof design plans PDF. This document can be used for planning, permitting, or communicating your design to contractors. Remember to always consult with a qualified professional for structural engineering advice and to ensure your design meets local building codes.
    ```

    Best 20+ Flat Pictures & Images

    Best 20+ flat pictures & images unsplash.com

    100+ Flats Pictures

    100+ flats pictures unsplash.com

    Flat On Behance

    Flat on behance www.behance.net
    Read More..

    Rabu, 22 Oktober 2025

    96+ Timber Framing

    What is timber framing and its role in construction? 
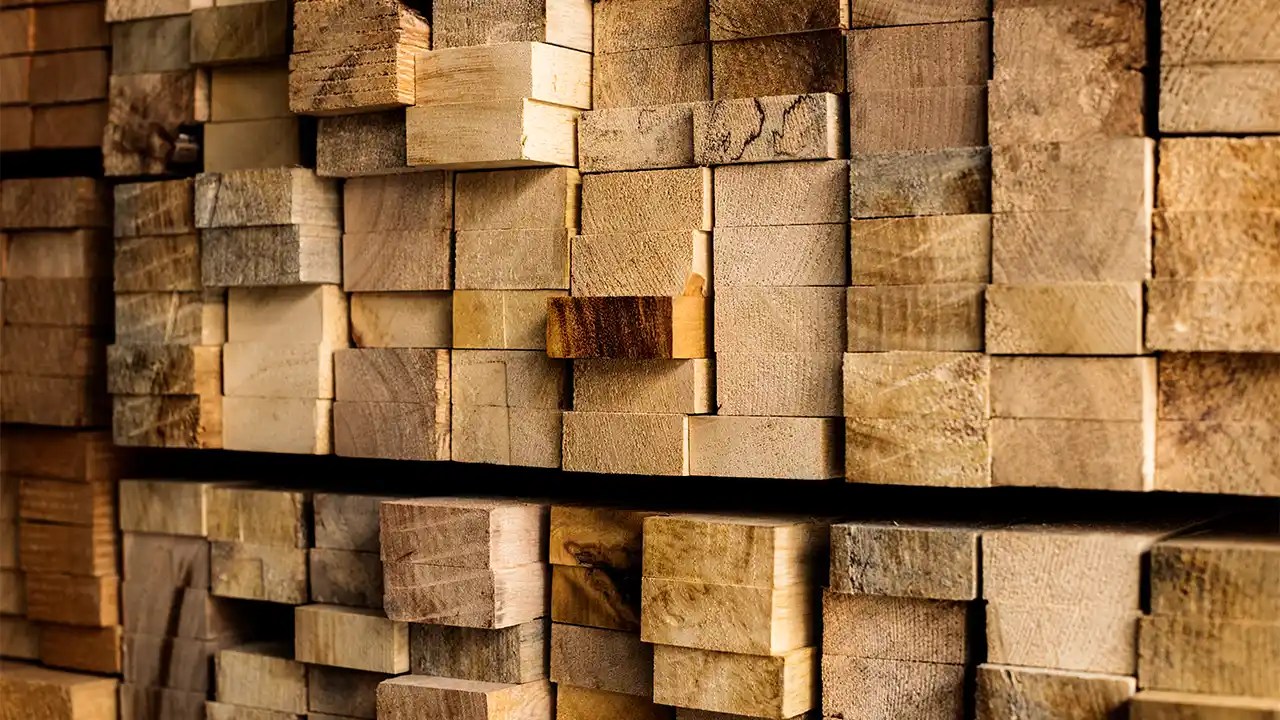
www.smaestimating.com

    ```html
    Opening: Embark on a Timber Framing Adventure! Are you ready to build something truly lasting? Timber framing offers a unique blend of craftsmanship and structural integrity. This post will guide you through the essential steps to create your own timber frame structure. While a full house frame is a large undertaking, we'll focus on techniques and principles applicable to smaller projects like sheds, pergolas, or even decorative frames.
    Step 1: Planning and Design. The foundation of any successful timber frame is a well-thought-out plan.
  • Determine the size and purpose of your structure.
  • Create detailed drawings showing all dimensions, joint locations, and timber sizes.
  • Consider the local building codes and regulations.
  • Choose your wood species based on availability, cost, and desired durability (e.g., Oak, Douglas Fir, Pine).
  • Accurate plans will save you time and resources during the construction phase.
    Step 2: Timber Selection and Preparation. Selecting the right timbers is crucial for a strong and beautiful frame.
  • Source your timbers from a reputable lumberyard or mill specializing in timber framing.
  • Inspect each timber for defects such as knots, checks, and rot. Reject any timbers with significant structural flaws.
  • Allow the timbers to acclimate to your local climate to minimize warping or cracking after assembly. This may involve stickering the timbers for a period of time.
  • Surface the timbers if a smooth, finished look is desired. This can be done with a planer or hand tools.
  • Step 3: Cutting the Joints. Timber framing relies on strong, interlocking joints to hold the structure together. Common joints include mortise and tenon, dovetails, and scarf joints.
  • Accurately layout the joint locations on each timber using your plans. Precision is key.
  • Use a combination of hand tools (saws, chisels, mallets) and power tools (mortiser, tenoner) to cut the joints.
  • Dry-fit the joints frequently to ensure a tight and accurate fit. Adjust as needed.
  • Consider practicing on scrap timber before cutting the joints on your main timbers.
  • Step 4: Assembly. Once all the joints are cut, it's time to assemble the frame.
  • Start by assembling smaller sections, such as bents (vertical frames).
  • Use wedges and pegs (often made from hardwood) to secure the joints.
  • Ensure that each section is square and plumb before moving on to the next.
  • Use scaffolding or lifting equipment as needed to safely raise and assemble the frame.
  • Step 5: Raising the Frame. This is often the most exciting and challenging part of the process.
  • Gather a team of helpers to assist with the raising.
  • Use ropes, pulleys, and levers to lift the assembled sections into place.
  • Temporarily brace the frame with diagonal supports to prevent it from collapsing.
  • Once the frame is fully raised, permanently brace it with cross-bracing or sheathing.
  • Step 6: Finishing and Detailing. With the frame erected, you can now focus on the finishing touches.
  • Install roofing and siding.
  • Add windows and doors.
  • Apply a finish to protect the timbers from the elements.
  • Add any decorative elements you desire.
  • Conclusion: A Legacy in Wood. Building a timber frame is a rewarding experience that connects you to a long tradition of craftsmanship. By following these steps and taking the time to learn the necessary skills, you can create a beautiful and lasting structure that will be enjoyed for generations to come. Remember to start small, be patient, and enjoy the process!
    ```

    What Is Timber Framing And Its Role In Construction?

    What is timber framing and its role in construction? www.smaestimating.com

    Timber Framing

    Timber framing peacheyconstruction.com

    Timber Framing

    Timber framing 
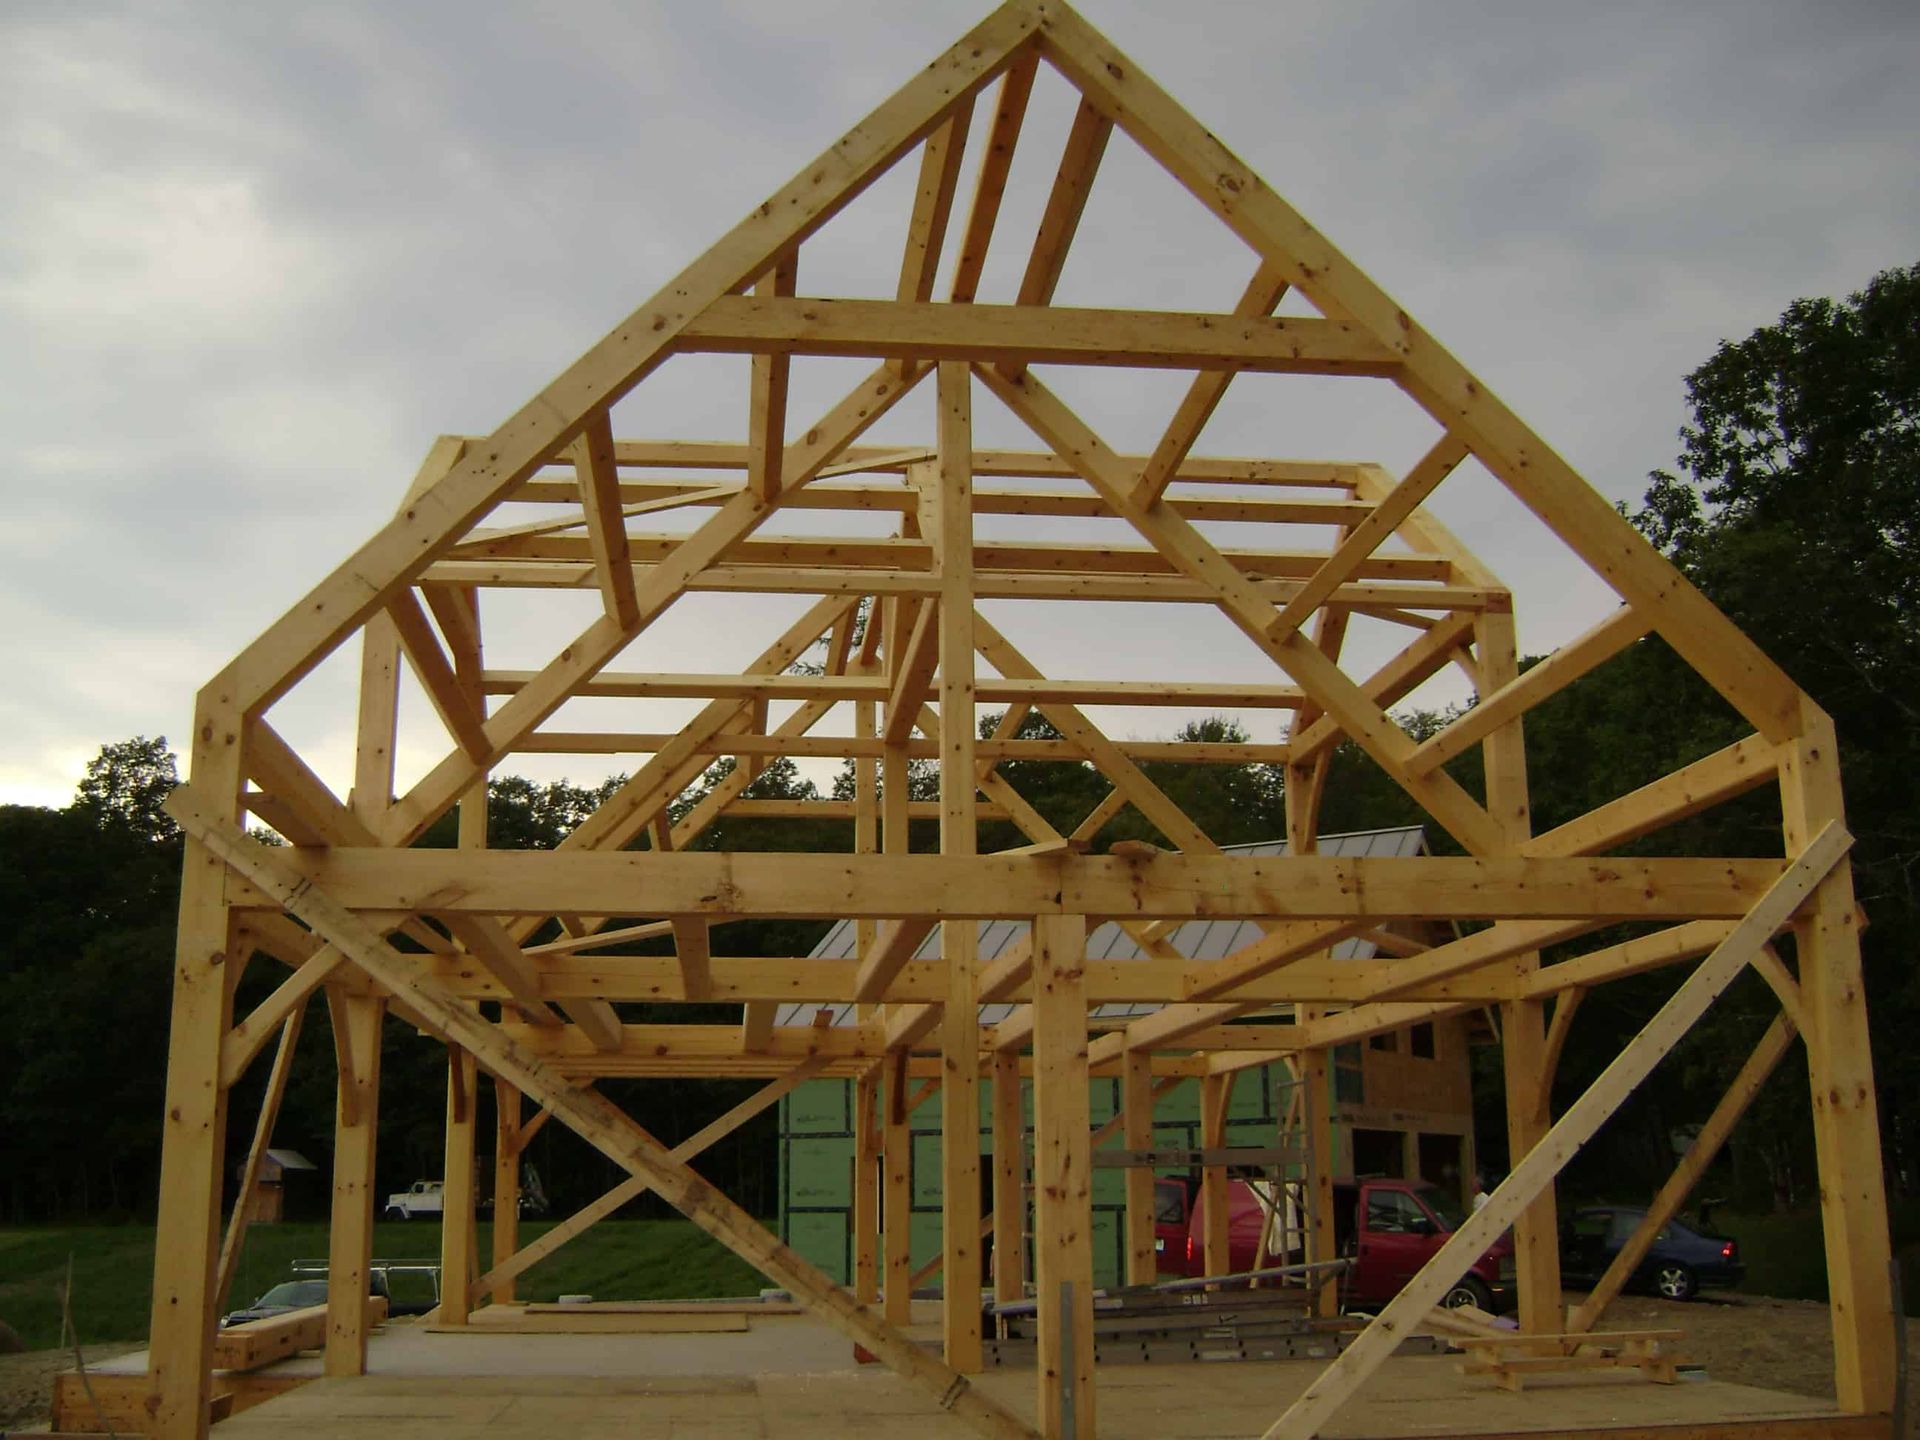
www.hideawayrestoration.com
    Read More..

    Selasa, 21 Oktober 2025

    106+ Cheap Shed Plan

    Cheap and easy family dinners www.budgetbytes.com

    Introduction: The Allure of a DIY Shed Building your own shed can be a rewarding experience, saving you money while providing valuable storage or workspace. This post offers a comprehensive, step-by-step guide to constructing a basic, affordable shed, focusing on readily available materials and simple construction techniques.
    Step 1: Planning and Preparation Before you even think about picking up a hammer, careful planning is crucial. This involves several key elements:
    • Permits and Regulations: Check your local building codes and homeowner's association rules to ensure your shed complies with regulations. Some areas require permits for structures exceeding a certain size.
    • Size and Location: Determine the ideal size of your shed based on your storage needs and the available space in your yard. Consider factors like sunlight, drainage, and proximity to property lines. Mark the proposed location with stakes and string.
    • Foundation Type: Choose a suitable foundation. Options include concrete slab, gravel pad, or pier blocks. A gravel pad is often the most cost-effective and easiest to install for smaller sheds.
    • Design and Materials List: Create a basic design sketch, outlining the dimensions, roof style, and door/window placement. Based on this, compile a detailed materials list including lumber, roofing materials, siding, fasteners, and hardware.
    Step 2: Preparing the Foundation A stable foundation is essential for a long-lasting shed.
    • Gravel Pad (Recommended for smaller sheds): Remove sod and topsoil from the marked area. Excavate to a depth of about 4-6 inches. Add a layer of landscape fabric to prevent weed growth. Fill the excavated area with compacted gravel, ensuring it's level and extends slightly beyond the shed's footprint.
    • Concrete Slab (For more substantial sheds): Build a form using lumber. Pour concrete and level it with a screed board. Allow the concrete to cure completely before proceeding.
    • Pier Blocks: Position pier blocks according to your design, ensuring they are level.
    Step 3: Building the Floor Frame The floor frame provides a solid base for your shed.
    • Cut Lumber: Cut lumber (typically pressure-treated 2x4s or 2x6s) according to your plans.
    • Assemble the Frame: Assemble the perimeter frame, ensuring square corners. Use screws or nails and metal framing connectors for added strength.
    • Add Joists: Install floor joists spaced evenly within the frame. The spacing will depend on the lumber size and the intended load. 16 inches on center is a common spacing.
    • Attach Sheathing: Cover the frame with plywood or OSB sheathing, securing it with screws or nails.
    Step 4: Constructing the Walls The walls provide structural support and enclose the shed.
    • Cut Wall Studs: Cut wall studs to the desired height, accounting for the top and bottom plates.
    • Assemble Wall Frames: Assemble each wall frame, including studs, top plates, and bottom plates. Leave openings for doors and windows.
    • Raise and Secure Walls: Raise each wall frame and secure it to the floor frame, ensuring it's plumb and square. Use temporary bracing to hold the walls in place.
    • Connect Walls: Connect the walls to each other at the corners, using screws, nails, and metal connectors.
    Step 5: Building the Roof The roof protects the shed from the elements. A simple gable roof is a good option for beginners.
    • Cut Rafters: Cut rafters according to your roof design. Use a rafter square to mark the angles for the birdsmouth cut (where the rafter sits on the wall) and the ridge cut (where the rafters meet at the peak).
    • Assemble Rafters: Assemble the rafters into pairs, connecting them at the ridge.
    • Install Rafters: Position the rafter pairs along the top of the walls, spacing them evenly. Secure them with screws, nails, and hurricane ties.
    • Add Sheathing: Cover the rafters with plywood or OSB sheathing, securing it with screws or nails.
    Step 6: Installing Roofing and Siding These provide weather protection and the shed's aesthetic appearance.
    • Install Underlayment: Apply roofing felt or synthetic underlayment to the roof sheathing, overlapping the edges.
    • Install Roofing: Install shingles, metal roofing, or other roofing material according to the manufacturer's instructions.
    • Install Siding: Attach siding to the walls, such as wood siding, vinyl siding, or metal siding. Overlap the siding panels according to the manufacturer's instructions.
    Step 7: Installing Doors and Windows These provide access and ventilation.
    • Install Door Frame: Install the door frame into the prepared opening.
    • Hang Door: Hang the door using hinges.
    • Install Door Hardware: Install the door handle, lock, and any other desired hardware.
    • Install Windows: Install windows into the prepared openings.
    Step 8: Finishing Touches These add the final details and functionality.
    • Install Trim: Install trim around the doors, windows, and corners of the shed to create a finished look.
    • Add Gutters and Downspouts: Install gutters and downspouts to direct rainwater away from the shed's foundation.
    • Paint or Stain: Paint or stain the shed to protect the wood and enhance its appearance.
    • Add Shelving or Organization: Install shelving, hooks, or other organization systems to maximize storage space.
    Conclusion: Enjoy Your New Shed Congratulations! You've successfully built your own shed. With careful planning and construction, your shed will provide valuable storage or workspace for years to come. Remember to regularly inspect and maintain your shed to ensure its longevity.

    Cheap Icon

    Cheap icon ar.inspiredpencil.com

    So Cheap Meme

    So cheap meme ar.inspiredpencil.com

    Cheap And Easy Family Dinners

    Cheap and easy family dinners www.budgetbytes.com
    Read More..

    Senin, 20 Oktober 2025

    85+ Tuff Shed Logo

    Tuff t11 20x9 +10mm www.customwheeloffset.com

    DIY Backyard Compost Bin: A Step-by-Step Guide
    Composting is an excellent way to reduce waste, enrich your garden soil, and create a sustainable ecosystem in your backyard. Building your own compost bin is easier than you might think, and this guide will walk you through each step.
    Materials and Tools You'll Need:
    • Four wooden pallets (all the same size)
    • Heavy-duty staples or screws
    • Staple gun or drill
    • Measuring tape
    • Gloves
    • Safety glasses
    • Optional: Chicken wire or hardware cloth (for the bottom)
    • Optional: Hinges and latch (for a front door)
    Step 1: Prepare Your Pallets Inspect your pallets for any loose nails or splintered wood. Remove any hazards to ensure a safe workspace. If the pallets are dirty, you can lightly clean them with a brush and water.
    Step 2: Assemble the Frame Arrange the four pallets to form a square or rectangle. Stand the pallets on their edges to create the walls of your compost bin. Ensure the corners are aligned as closely as possible.
    Step 3: Secure the Pallets Using your staple gun or drill, securely attach the pallets together at the corners. If using staples, use heavy-duty staples designed for wood. If using screws, pre-drill pilot holes to prevent the wood from splitting. Reinforce each corner with multiple staples or screws.
    Step 4: Add a Bottom (Optional) If you want to prevent rodents from entering your compost bin from the bottom, you can add a layer of chicken wire or hardware cloth. Cut the wire to fit the bottom of the bin, and secure it to the inside of the pallets using staples or screws.
    Step 5: Create a Front Door (Optional) To make it easier to access the compost, you can create a front door on one side of the bin. Cut one of the pallet slats on the front side. Attach hinges to the cut slat and the adjacent pallet to create a swinging door. Install a latch to keep the door closed.
    Step 6: Location, Location, Location! Choose a location for your compost bin that is level, well-drained, and easily accessible. A spot that receives some sunlight is ideal, but avoid full sun in hot climates, as it can dry out the compost too quickly.
    Step 7: Start Composting! Now that your compost bin is built, you can start adding your organic waste. Remember to layer "green" materials (like grass clippings and vegetable scraps) with "brown" materials (like leaves and shredded paper) to maintain a healthy compost pile.
    Conclusion: Building your own compost bin is a simple and rewarding project that can benefit both your garden and the environment. With a few basic materials and tools, you can create a functional and sustainable way to manage your organic waste. Happy composting!

    Tuff Rock

    Tuff rock geologyscience.com

    Tuff T11 20x9 +10mm

    Tuff t11 20x9 +10mm www.customwheeloffset.com

    Tuff Rock types, properties, formation, uses" src="https://i0.wp.com/geologyscience.com/wp-content/uploads/2019/05/Rhyolitic-volcanic-tuff.jpg" width="100%" onerror="this.onerror=null;this.src='https://ts4.explicit.bing.net/th?id=OIP.EgqIyC7R3vd8TR6aupU8EAHaFA&pid=15.1';" /> geologyscience.com

    Read More..

    Minggu, 19 Oktober 2025

    134+ Flat Roof House Cons

    What is a flat? discover if this rental option is right for you www.apartmentguide.com

    Introduction: Building a Simple Birdhouse Are you looking for a fun and rewarding DIY project? Building a birdhouse is a great way to attract birds to your garden and add a touch of nature to your outdoor space. This guide will walk you through the steps of creating a basic birdhouse using simple materials and tools. Let's get started!
    Materials and Tools You'll Need Before you begin, gather the necessary materials and tools:
  • Untreated wood (pine or cedar are good choices) approximately 1 board foot
  • Wood glue
  • Screws or nails
  • Saw (hand saw or power saw)
  • Drill with drill bits
  • Measuring tape or ruler
  • Pencil
  • Sandpaper
  • Clamps (optional, but helpful)
  • Safety glasses
  • Step 1: Cutting the Wood Pieces Start by measuring and cutting the wood pieces according to the following dimensions (these can be adjusted to suit your preferences, but this is a good starting point):
  • Front: 6" wide x 8" tall
  • Back: 6" wide x 10" tall (the extra height allows for a slanted roof)
  • Sides (2 pieces): 6" wide x 7" tall
  • Bottom: 6" wide x 6" deep
  • Roof (2 pieces): 6" wide x 7" deep
  • Carefully cut each piece to the correct size using your saw. Remember to wear safety glasses.
    Step 2: Assembling the Box Now, it's time to assemble the main body of the birdhouse.
  • Apply wood glue to the edges of the bottom piece.
  • Attach the sides to the bottom, ensuring they are flush. Use clamps to hold them in place while the glue dries, or use screws/nails to secure them immediately.
  • Attach the front and back pieces in the same way, making sure the back piece extends above the sides to create the roof slant.
  • Let the glue dry completely if using glue only.
    Step 3: Creating the Entrance Hole Next, create the entrance hole for the birds.
  • Decide where you want the hole to be on the front piece (typically about 2" to 3" from the top).
  • Use a drill with a suitable drill bit to create the hole. The size of the hole depends on the type of bird you want to attract (a 1 1/2" hole is good for wrens, chickadees, and titmice).
  • Sand the edges of the hole to remove any splinters.
  • Step 4: Attaching the Roof Now, attach the roof pieces.
  • Apply wood glue to the top edges of the front, back, and side pieces.
  • Position the roof pieces on top, overlapping slightly in the middle.
  • Secure the roof pieces with screws or nails. Ensure the roof overhangs the front slightly to protect the entrance hole from rain.
  • Step 5: Sanding and Finishing Once the birdhouse is assembled, it's time to sand and finish it.
  • Sand all the edges and surfaces of the birdhouse to remove any rough spots.
  • You can leave the birdhouse unfinished, or you can apply a non-toxic sealant or paint to protect it from the elements. Avoid using bright colors or intricate decorations, as these may deter birds.
  • Step 6: Mounting the Birdhouse Finally, decide where you want to mount your birdhouse.
  • You can attach it to a tree, post, or side of a building.
  • Use screws or nails to securely attach the birdhouse to its mounting location. Ensure it is in a sheltered spot, away from direct sunlight and strong winds.
  • Conclusion: Enjoy Your New Birdhouse Congratulations! You've successfully built your own birdhouse. Now, sit back and enjoy watching the birds move in and make it their home. Remember to clean the birdhouse out each year after the nesting season to keep it clean and healthy for its inhabitants. Happy bird watching!

    100+ Flats Pictures

    100+ flats pictures unsplash.com

    Best 20+ Flat Pictures & Images

    Best 20+ flat pictures & images unsplash.com

    What Is A Flat? Discover If This Rental Option Is Right For You

    What is a flat? discover if this rental option is right for you www.apartmentguide.com
    Read More..